Synchronizing Local Windows Active Direcory to Azure Active Directory
Challenge/ Scenario/ Case Study/ Project
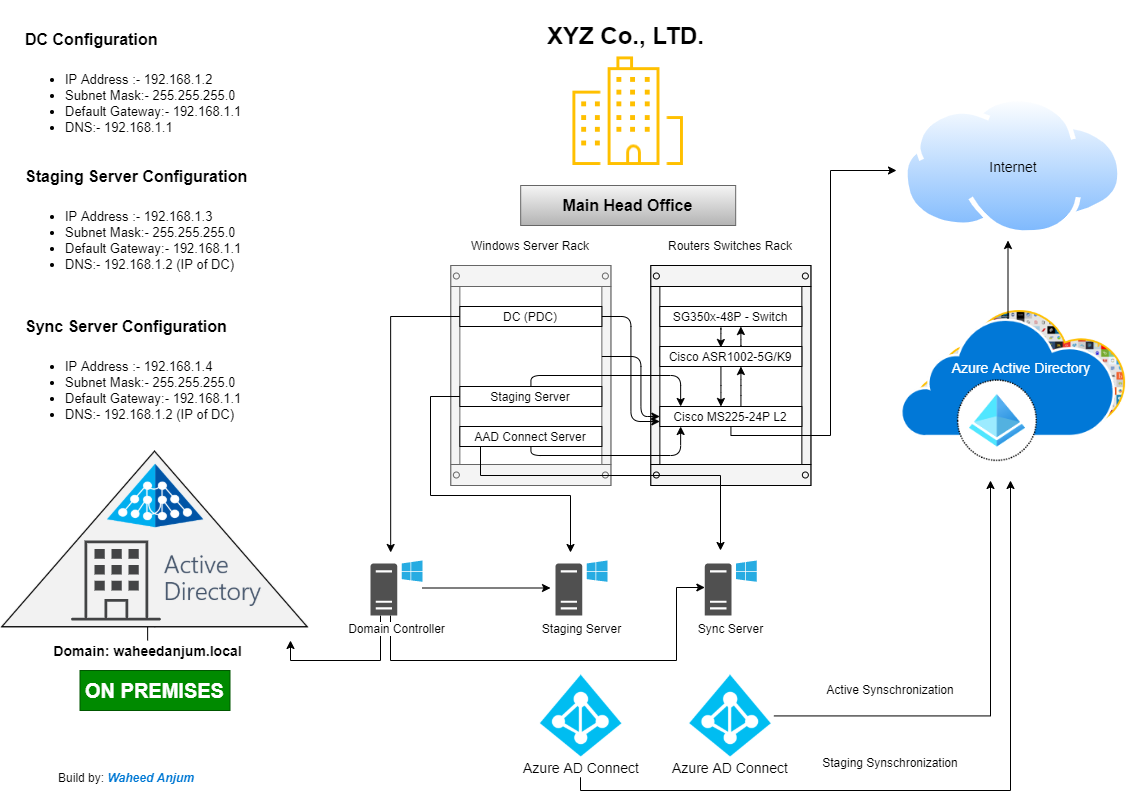
XZY Co., Ltd. is a well-known company in the automotive industry that specializes in supplying customers with quality automobiles. The company wants to move its IT infrastructure to the Microsoft Azure cloud. The main challenge is synchronizing on-premises Active Directory objects to Azure AD using the Azure AD Connect agent. This company has its XXXXX users, YYYY groups, and ZZZZ number of devices that need to be synced with Azure AD. However, the company now wants to use Password Hash Authentication and enable Single Sign-on (SSO) to access Azure AD registered cloud applications. If users reset their passwords from any cloud application [For example, OneDrive, Outlook.com or microsoft365.com, etc.], they need to be written back to the on-premises Active Directory. A staging sync server should be present for redundancy, and for security reasons, the Azure AD Connect agent must not be installed directly on any of the Domain Controllers [PDC, ADC, RoDC & Child-Dc etc.].
Resource Check List
- Windows Domain Controller
- Staging Server [Member Server]
- Sync Server [Member Server]
- Global Administrator or Hybrid Identity Administrator account in Azure Active Directory
- Simple Domain User account [It will work as a postman] {For example, aad.sync@waheedanjum.local}
- Enterprise Administrator account [If you want to choose by default option]
On-Prem Infrastructure Readiness
- Domain Controller must have Static IP Address.
- Take a backup or Snapshot of your Domain Controller
- Make sure your users are created with routable domain i.e., abdullah@waheedanjum.eu
- If your users are created with non-routable domain [For example, abdullah@waheedanjum.local], they will be synced to AAD but the UPN will be changed to abdullah@tenantname.onmicrosoft.com
- Create one simple Domain User account in Service Accounts OU [For example, aadsync@waheedanjum.local]
- Log in to your Windows Server 2022 as an administrator.
- Assign Static IP Address and join your Staging Server to existing domain [For example, waheedanjum.local].
- Restart your server after joining the domain and login with Domain Admin account.
- Open PowerShell as an administrator. Run the following command to install the RSAT tools for Active Directory Domain Services. This server will remotely access your Local Active Directory objects without exposing your Domain Controller to the internet.
- Install Azure AD Connect Agent on this server Downlaod Agent from Microsoft Official website
Install Remote Server Administration Tools (RSAT) on a member server [Staging Server] so that it can remotely access all the Local Active Direcory objects.
Install-WindowsFeature RSAT-ADDS -IncludemanagementTools
- Log in to your Windows Server 2022 as an administrator.
- Assign Static IP Address and join your Sync Server to existing domain [For example, waheed.local].
- Restart your server after joining the domain and login with Domain Admin account.
- Open PowerShell as an administrator. Run the following command to install the RSAT tools for Active Directory Domain Services. This server will remotely access your Local Active Directory objects without exposing your Domain Controller to the internet.
- Install Azure AD Connect Agent on this server Downlaod Agent from Microsoft Official website
Install Remote Server Administration Tools (RSAT) on a member server [Sync Server] so that it can remotely access all the Local Active Direcory objects.
Install-WindowsFeature RSAT-ADDS -IncludemanagementTools
Step by Step Installation & Synchronization
You must have to add your routable domain (Apex Domain) into your Azure AD before starting Synchronization.
Got to your Azure Active Direcory > Click on Custom Domain Names > Click on Add > Go to your Public DNS and add the TXT record which you copied from Azure AD
Come back to Azure AD and Click on Verify [It will take upto 24 hour for domain verification depending you your DNS provider] > after verification make this domain primary > click on Make Primary
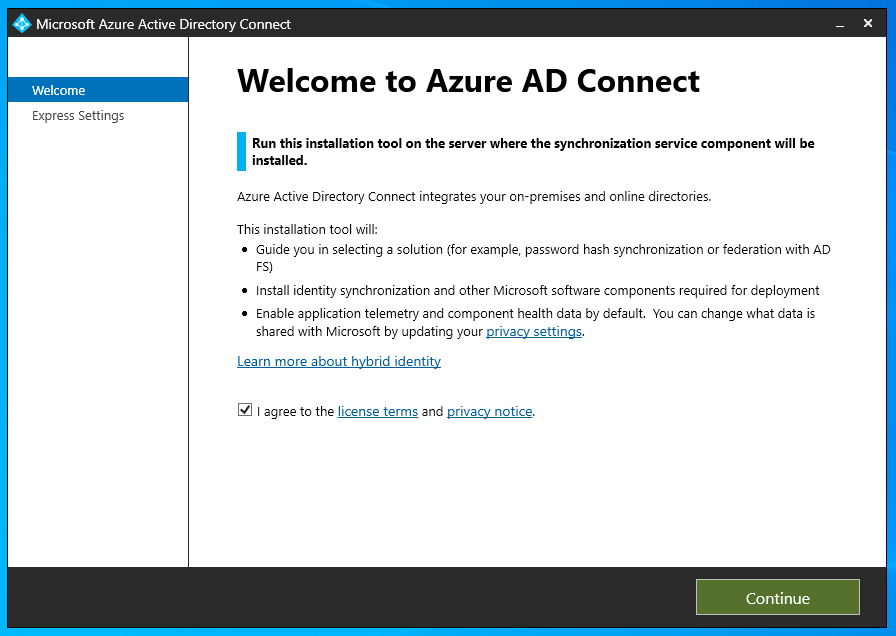
You have already installed Azure AD Connect Agent on Sync Server in previous steps. Open your AAD Connect Agent and accept the license terms & privacy notice. Click Continue
Step: 01
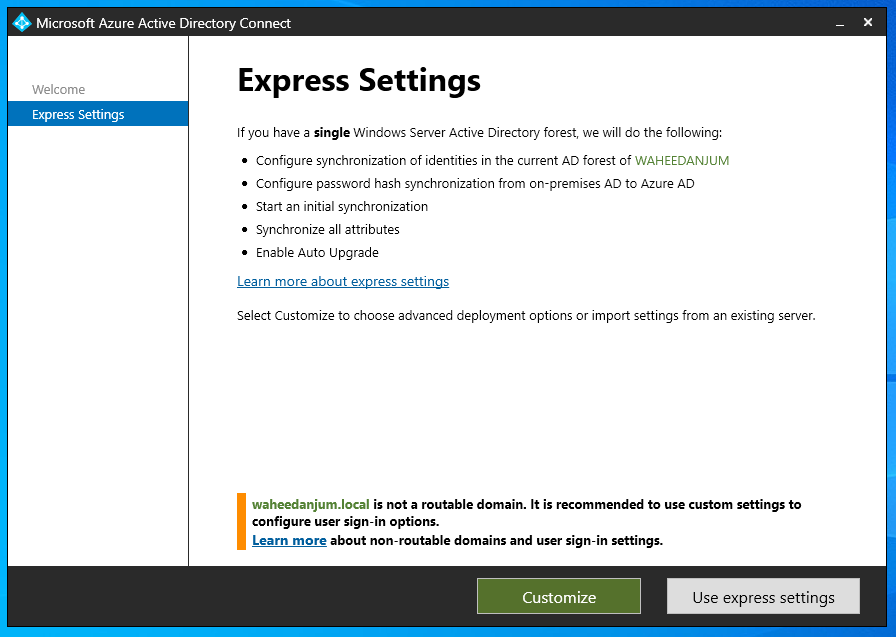
Step: 02 | Always select Use Express Setting if you are installing agent & configuring synchornization for the very first time.
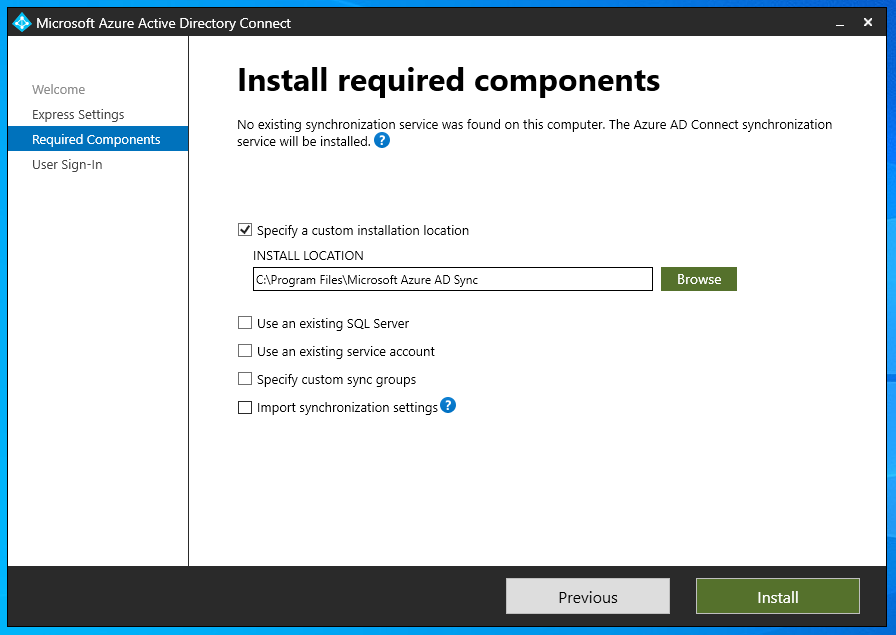
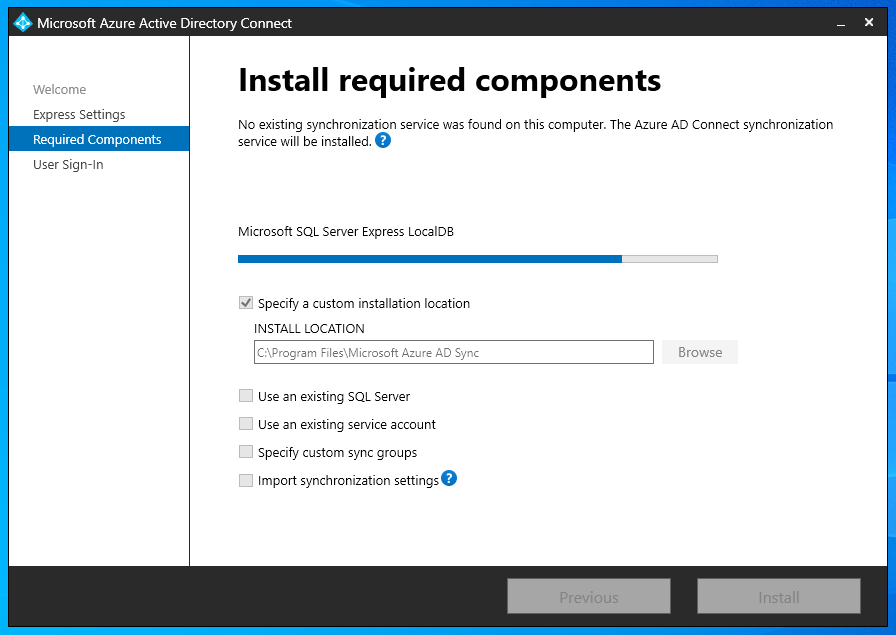
Step: 03 | Check Specify a custom installation location & Click on Install
Step: 04
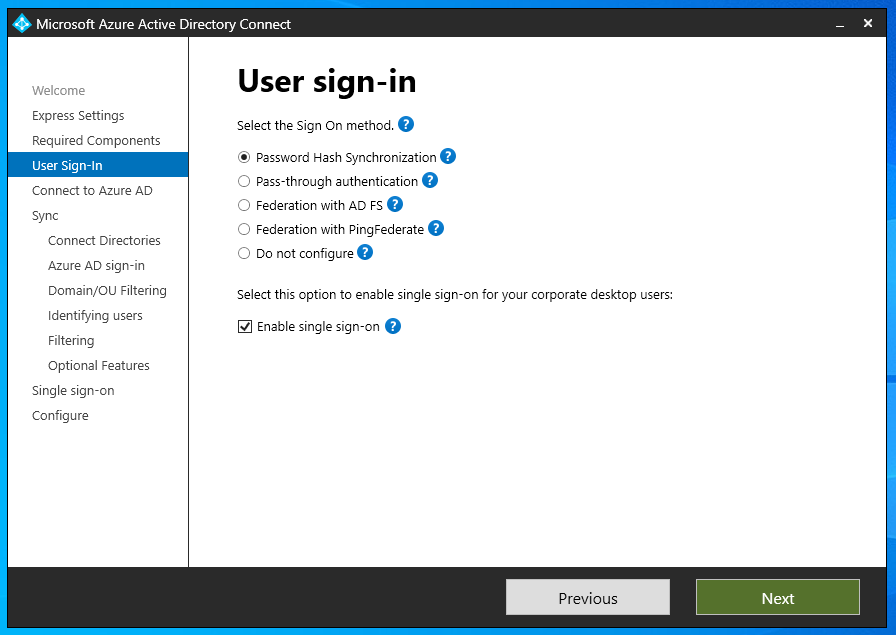
Step: 05 | Check on Password Hash Synchronization & Single-Sing on
Click here to see: Difference b/w Password Hash Synchronization & Pass-through Authentication
Step: 06 | Enter your Azure AD Global Admin or Hybrid identity Admin credentials.
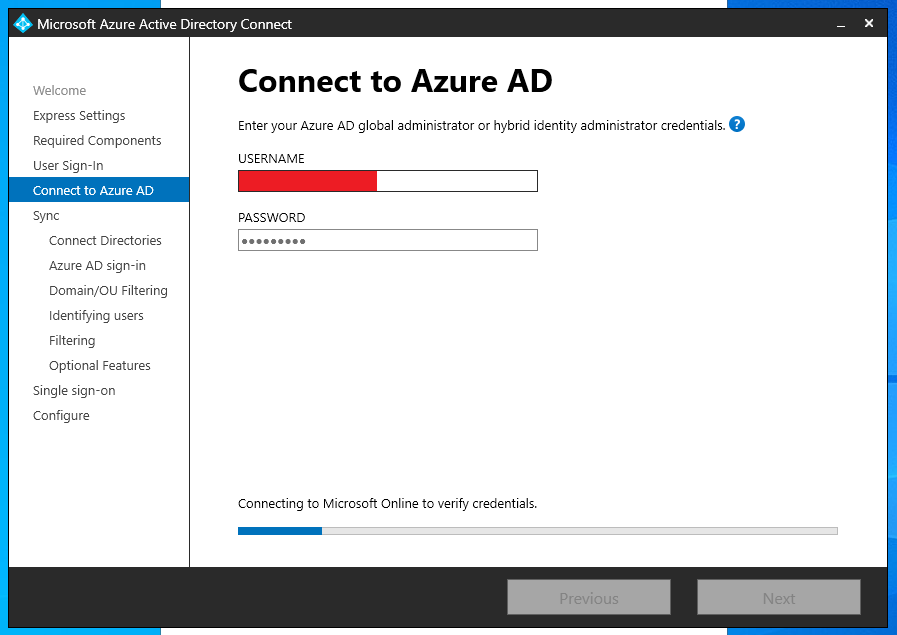
Step: 07
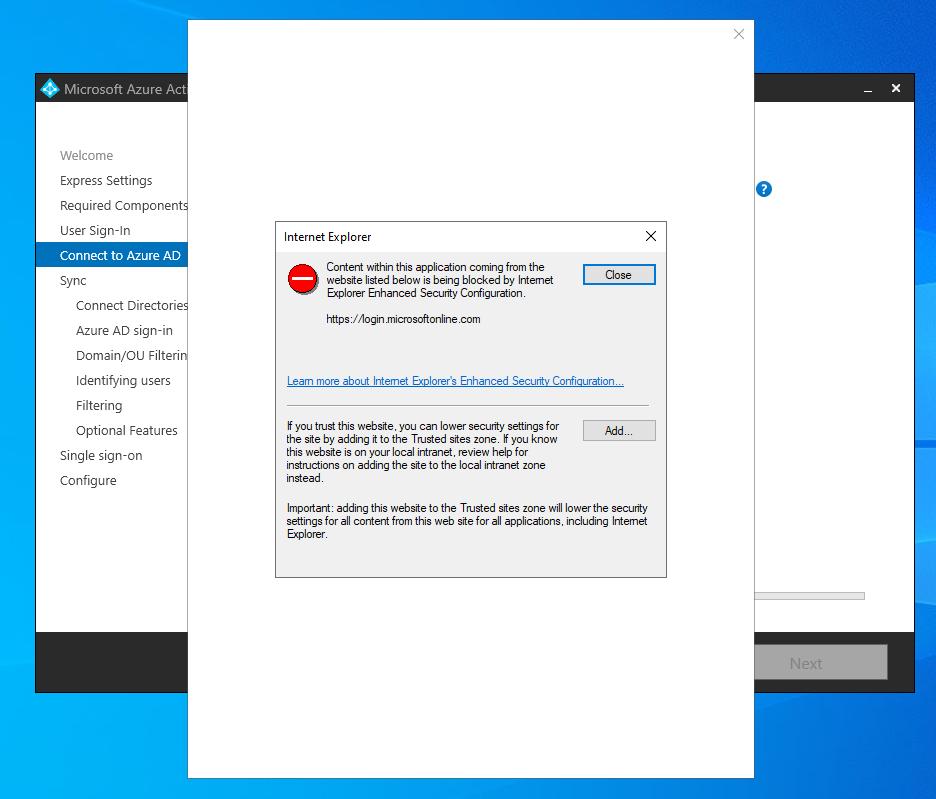
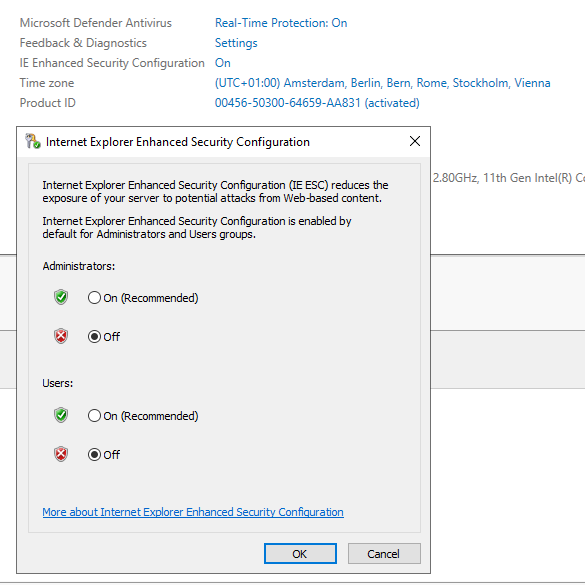
Step: 08 | During login process if you see this message, Click on Add and go to your Server Manager, Click on Internet Explorer Enhanced Security Configuration and switch both the options to Off
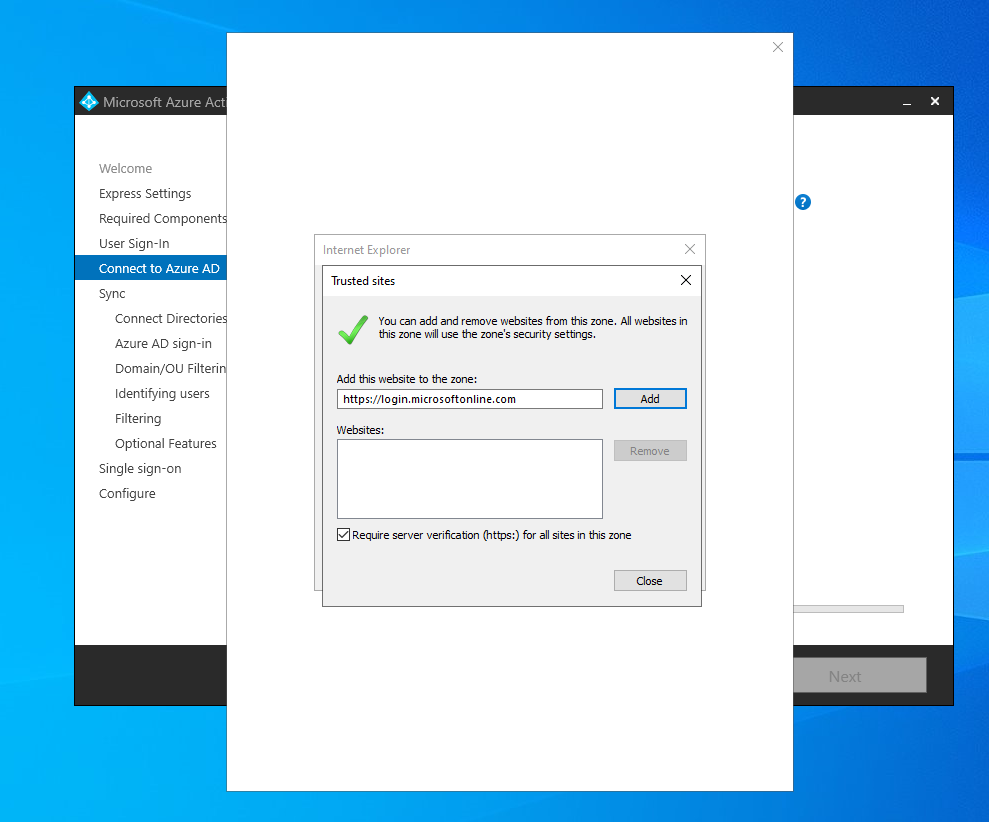
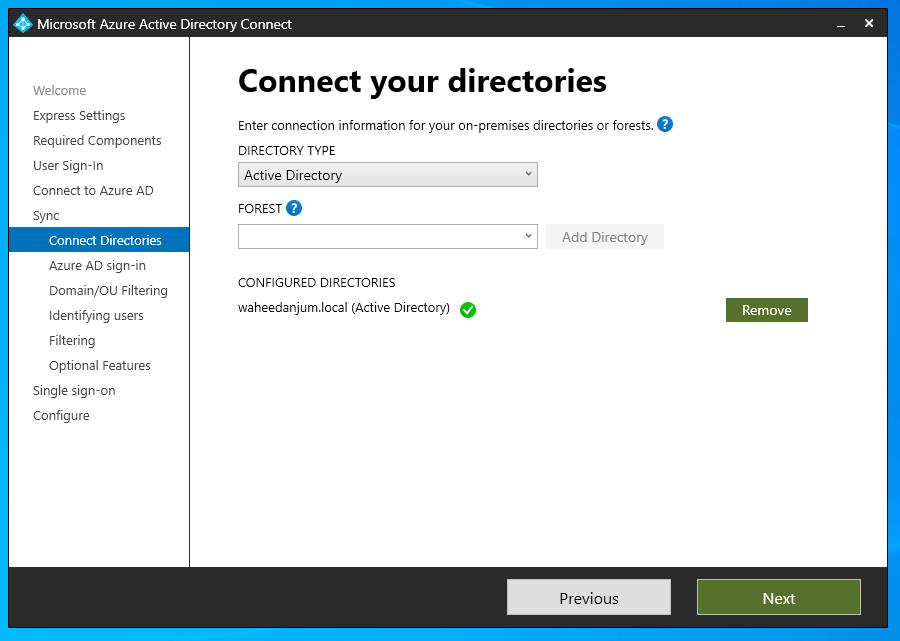
Step: 09 | Click on Add
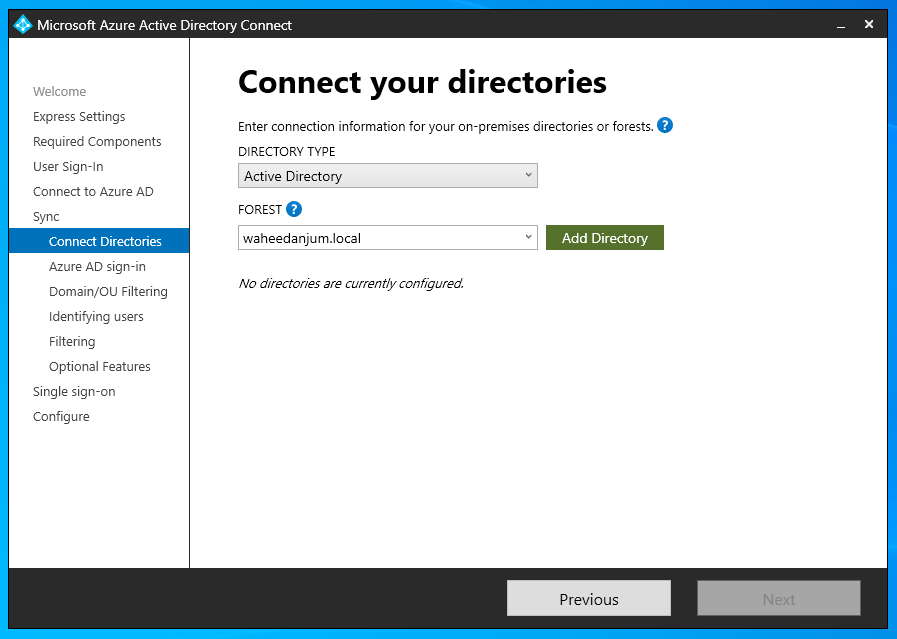
Step: 10 | Select your Local Active Directory from the dropdown list. You can Add multiple directories if you have.
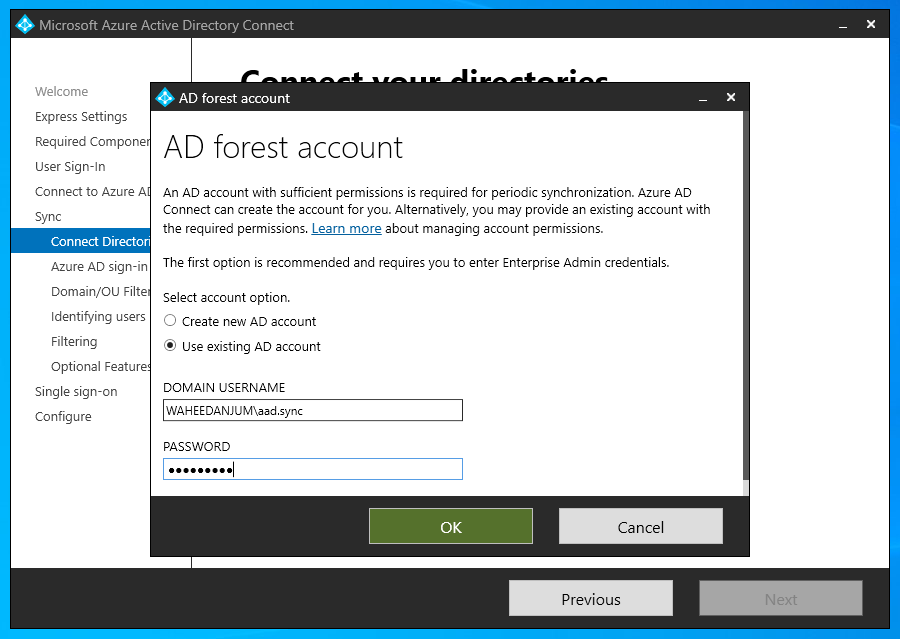
Step: 11 | Select Use existing AD acocunt and provide login information of the simple domain user that you created before. This account would be a regular user account because it needs only the default read permissions.
If you use first option, then Azure AD Connect uses the provided enterprise admin account to create the required AD DS account.
Step: 12 | Your Local Active Directory is added. Click on Next
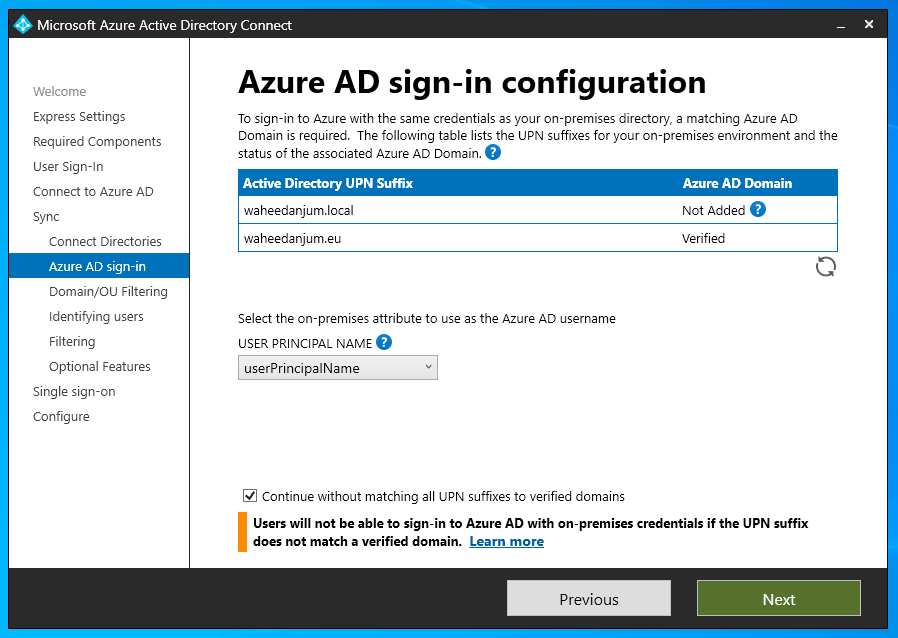
Step: 13 | Select UserPrinicipleName from the dropdown list and check the box. Then click on Next
Here you can see one non-routable domain (your local active directory) [waheedanjum.local] and second one is your Primary (apex) Domain [waheedanjum.eu] which you verified in the beginning.
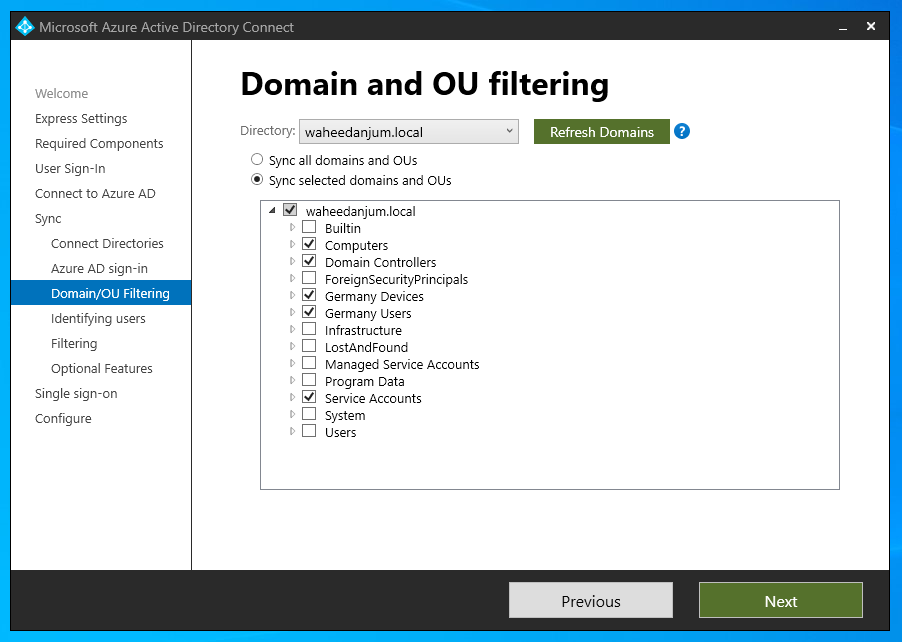
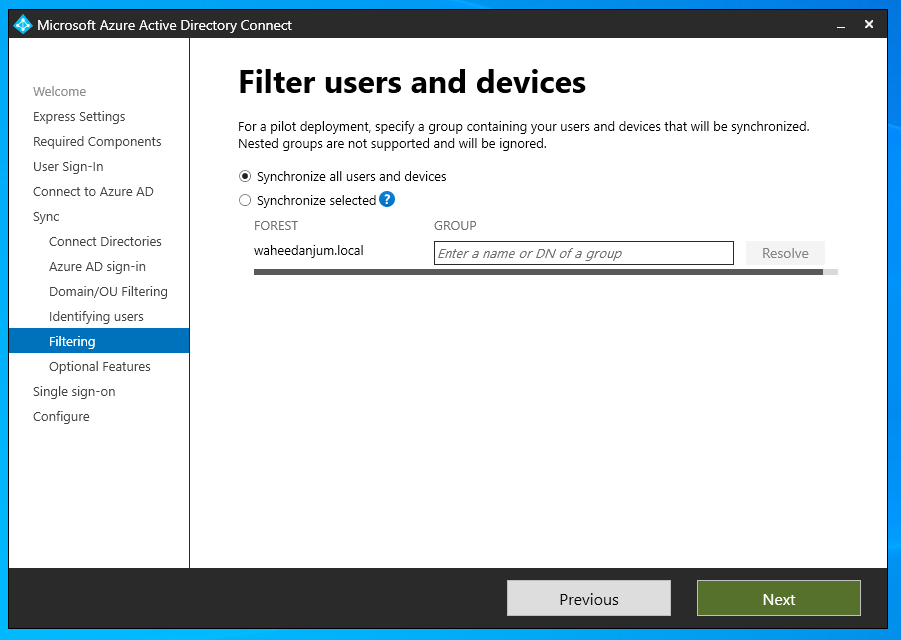
Step: 14 | Filter your OUs that you want to synchronize to your Azure AD.
Step: 15
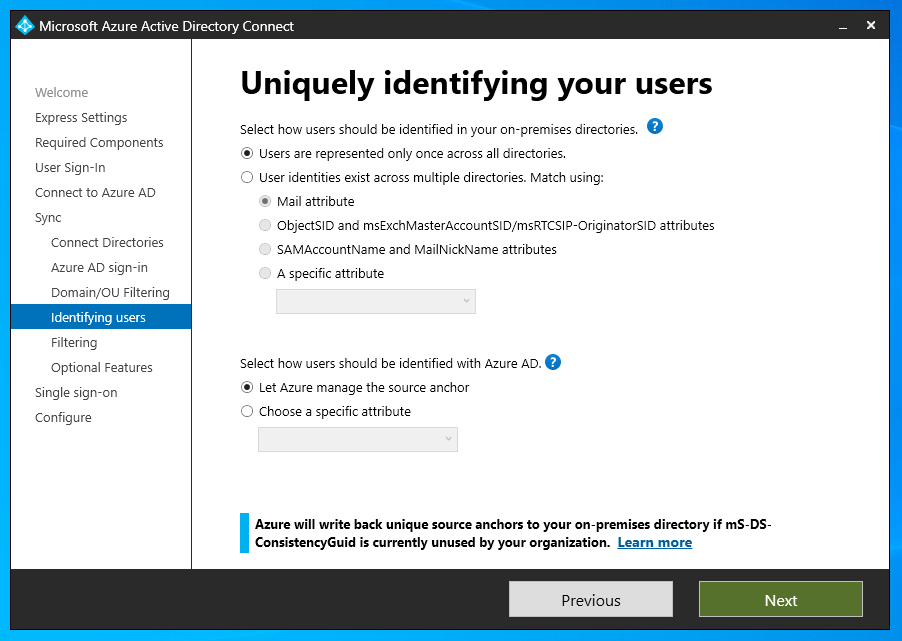
Step: 16
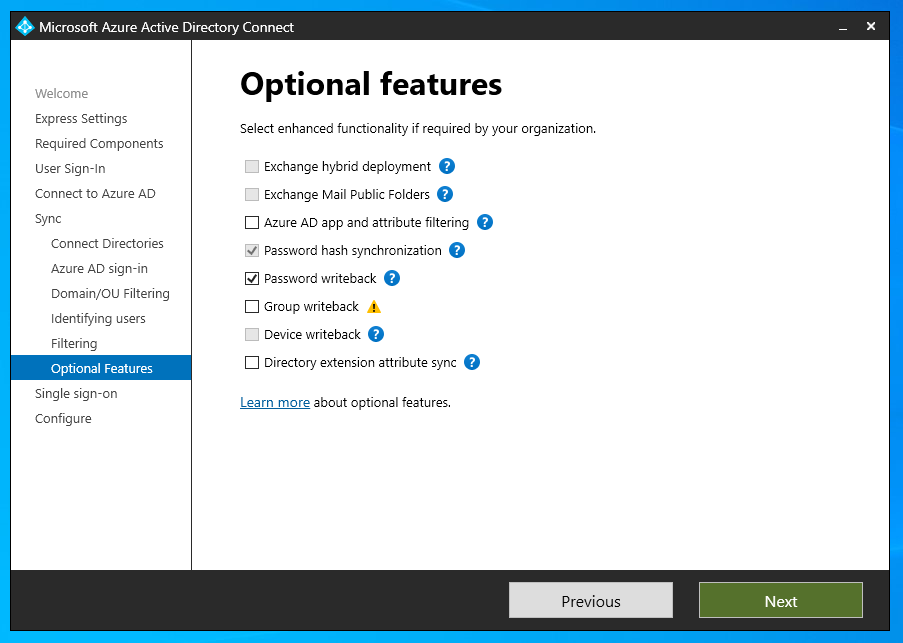
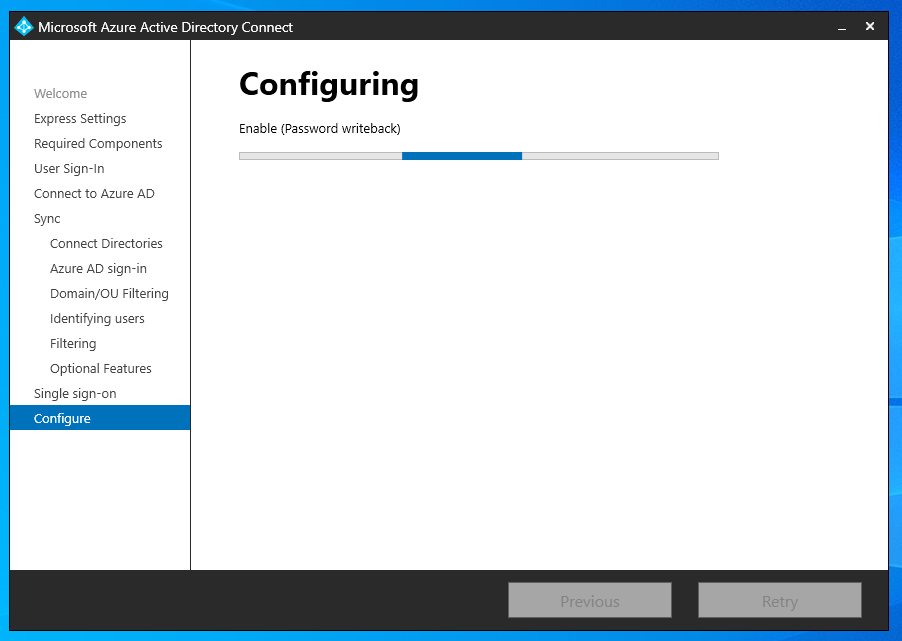
Step: 17 | Select Password writeback so that the password should be written back to your Local Active Directory if user change it via any cloud application i.e., OneDrive or Outlook.com
Step: 18 | Click Next
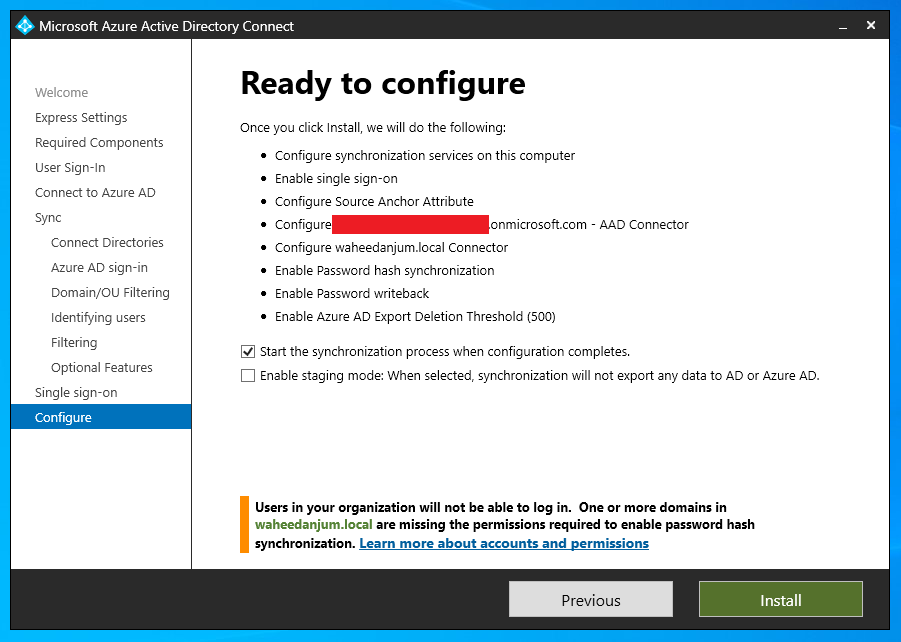
Step: 19 | Verify all the settings you selected in previous steps and click on Install
Here you can select whether you want to configure this Server and AD Connect as Active or Staging
1. Click on first option if you want to treat this Server & AD Connect as Active
2. Select Staging mode if you are making this Server & AD Connect as Redundant
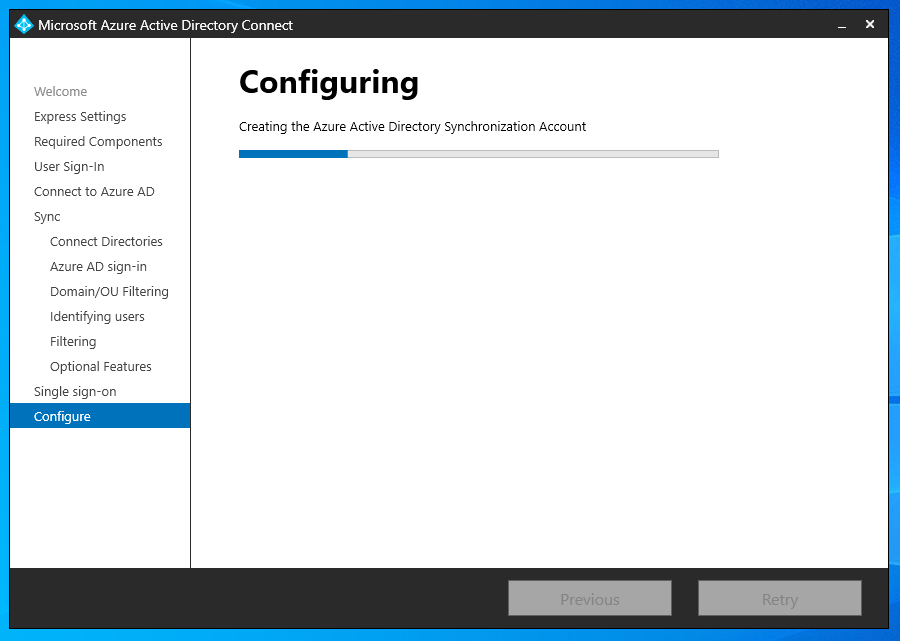
Step: 20
Step: 21
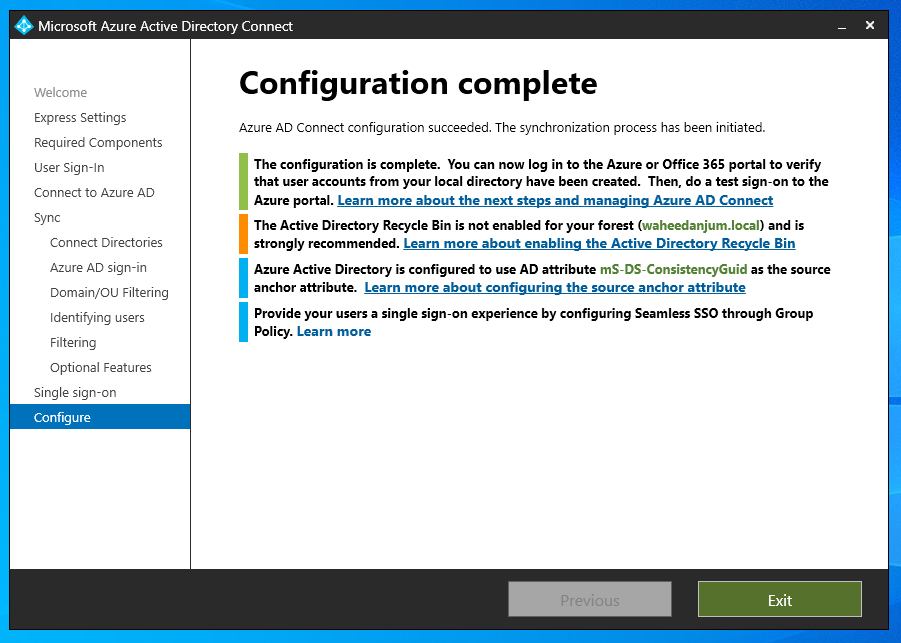
Step: 22 | Congratulations! You have successfully configured your synchornization.
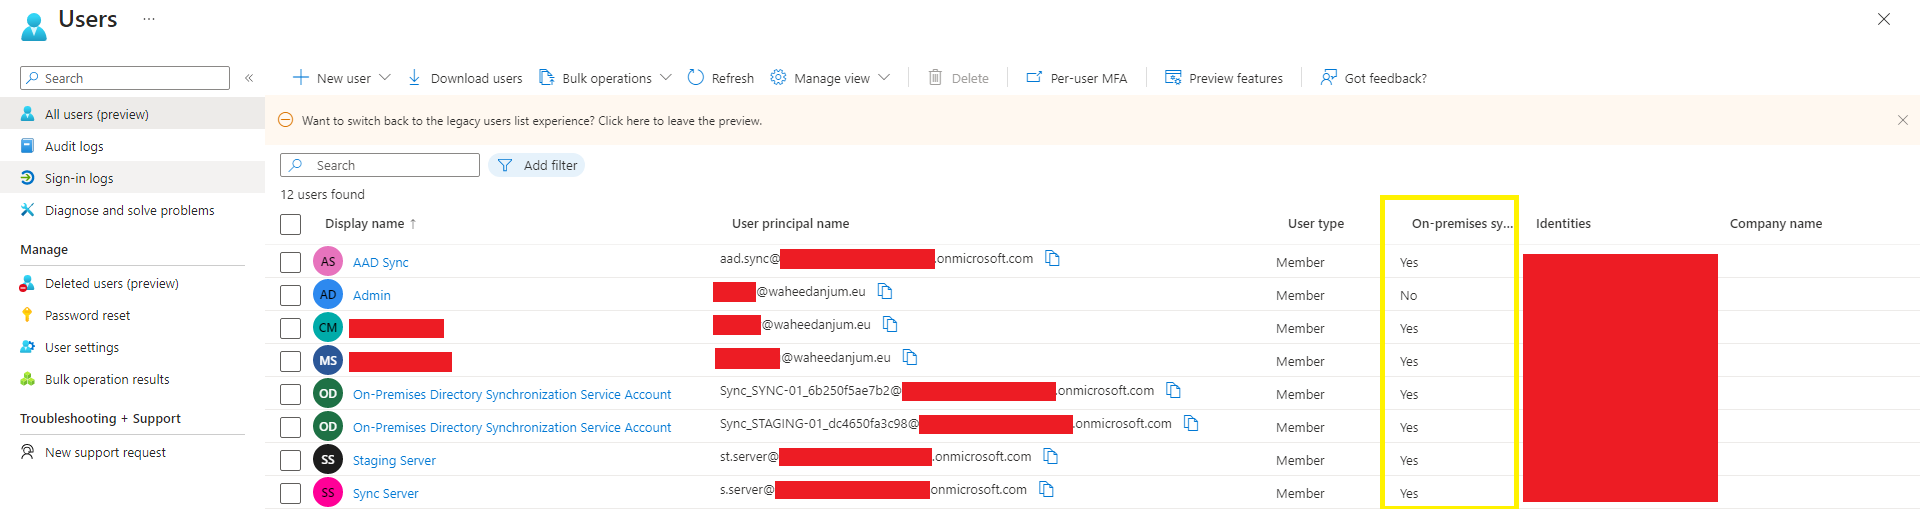
Step: 23 | Login into your Azure AD or Microsoft Entra to check te synchronized objects
Click here to see Hybrid AD Join Devices configuration
Reference: Custom installation of Azure Active Directory Connect configuration
Reference: Prerequisites for Azure AD Connect